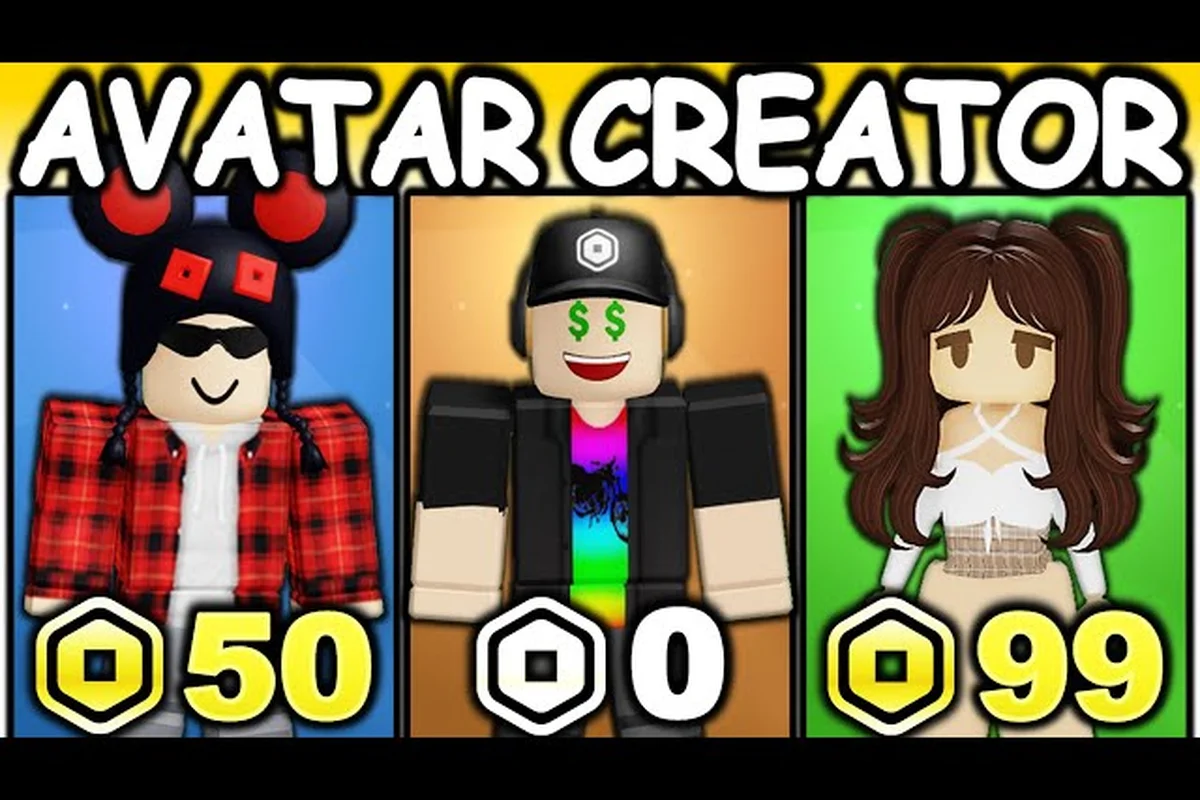
Catalog Avatar Creator is the largest in-experience avatar editor on Roblox, with over 50 million community-created outfits and a catalog that spans limiteds, hair combos, bundles, and animation packs. This Catalog Avatar Creator walkthrough covers everything from your first spawn to advanced outfit publishing, so you can stop guessing and start building looks that actually turn heads. Whether you are chasing the Outfit Designer role or just want to nail your first fit, the steps below follow the exact flow verified by the official game page and community tutorials.
The game won the Best Use of Fashion Roblox Innovation Award in 2023 and 2024, which tells you the developers treat avatar customization as a serious craft rather than a side feature. Because every purchase you make inside the experience syncs directly to your Roblox inventory, the skills you build here carry over to every other game you play. That cross-game utility is the core reason this walkthrough matters, and why mastering the editor early pays off for your entire Roblox account.
Getting Started: Your First Spawn and PC Controls
Using Outfit Codes to Load 50M+ Community Outfits
The outfit code menu, demonstrated in GuideRealm's 1:01 walkthrough, lets you bypass manual browsing entirely. Instead of scrolling the Community Outfit Feed, paste a creator's code to instantly load their full look into your editor. This is the fastest route to testing outfits from the official group's 39.6 million members, where creators drop codes for new designs. For example, entering a code from a UGC Creator's post loads their exact accessory layering and animation pack setup, which you can then modify and save as your own variant.
The 100,000 Try-Ons Threshold for Outfit Designer
The Outfit Designer role isn't granted by popularity alone—it requires your published outfit to hit 100,000+ try-ons. This metric counts every time a player loads your outfit via the Community Outfit Feed or an outfit code. To reach the threshold faster, publish outfits featuring trending limiteds or rare hair combos, as these attract more try-ons than basic free-item builds. Once unlocked, the role grants publishing privileges within the official 39.6 million-member group, giving your designs official visibility and access to creator announcement channels.
| Video | Duration | Published Context | Coverage |
|---|---|---|---|
| How to use Catalog Avatar Creator (With Timestamps!) | 22:21 | March 2023 | Full flow: catalog browse, try-on, editor, in-experience save, Roblox avatar save, outfit code menu |
| How To Enter Outfit Codes In Catalog Avatar Creator - Full Guide | 1:01 | — | Outfit code entry only |
| Bulk Purchasing Now Available! | Catalog Avatar Creator (Roblox Update) | 0:32 | — | Bulk purchasing update showcase |
When you first load into Catalog Avatar Creator, the experience drops you into a hub where the main editor interface is already open. The layout is clean: a large preview of your avatar on the left, a searchable catalog panel on the right, and a toolbar along the bottom for switching between avatar editing, outfit codes, and community feeds. On PC, your mouse handles most of the work, but a few keyboard shortcuts speed things up considerably once you know them.
The core loop is simple: search for an item, try it on for free, decide whether to buy it, then save the result to your Roblox avatar. That try-on-before-you-buy mechanic is the single biggest advantage this experience has over the standard Roblox avatar editor, because you can preview limiteds and expensive items without spending a single Robux. Community testing confirms that the preview system updates in real time, so you see exactly how a hat sits on your head or how a shirt drapes over your torso before committing.
Before you touch the avatar editor, lock in this quick reference table for PC controls—it’s the difference between a smooth first spawn and fumbling through the Catalog Avatar Creator walkthrough. Memorize WASD for movement, Shift to sprint, Space to jump, and C to toggle crouch, but the real game-changers are Tab to open the full avatar catalog mid-session and F to interact with spawn-point terminals. New players who skip learning E (quick-emote wheel) and M (map toggle) often waste precious time navigating the hub world, so drill these six bindings before customizing your first avatar—it cuts your early-game confusion by half and lets you focus on tweaking your character’s appearance instead of fighting the UI.
| Action | PC Control | Notes |
|---|---|---|
| Rotate camera | Left mouse drag | Works in both editor and preview |
| Zoom in/out | Mouse wheel | Useful for checking item clipping |
| Search catalog | Click search bar | Type item name or partial keyword |
| Try on item | Click item thumbnail | Applies instantly to your avatar |
| Buy item | Click Robux price button | Requires confirmed purchase prompt |
| Save avatar | Click Save button | Writes to your Roblox avatar |
| Open outfit codes | Click code icon | Opens the code entry menu |
The search bar is your best friend because it supports partial matches, which means typing "dragon" surfaces every item with that word in the title even if the full name is longer. You can also filter by category using the tabs above the results, and the price filter lets you sort from lowest to highest so free items surface first. New players often miss the sort dropdown, but it is essential for finding hidden gems among the millions of catalog entries.
Browsing the Catalog and Using the Community Outfit Feed
Bulk Purchasing: Saving Robux on Multi-Item Checkouts
The "Bulk Purchasing" update, covered in Muneeb's 0:32 video, changed how you finalize avatar purchases. Previously, each item required a separate transaction; now you can select multiple accessories, hats, and bundles in your editor and check out in one pass. This reduces transaction friction when buying a full hair combo plus animation pack. Since all purchases sync to your Roblox inventory for use in any game, bulk checkout is the practical choice when recreating a 50M+ community outfit that uses several paid items rather than free catalog pieces.
Cross-Platform Editor Sync Across Seven Devices
Catalog Avatar Creator runs on Windows, MacOS, iOS, Android, Xbox, PlayStation, and Meta Quest, and your in-experience saves sync across all of them via your Roblox account. This means you can start an outfit on your phone during a commute and finish it on PC, with all editor progress intact. The sync applies to both saved avatars and purchased items, so a bulk-purchased bundle on Xbox is immediately available on Meta Quest. For creators, this cross-platform reach expands your outfit's potential try-on pool beyond PC players alone.
The catalog in Catalog Avatar Creator pulls directly from Roblox's item database, which means you can find almost any accessory, hat, or clothing item that exists on the platform. The official game page notes that the experience allows you to try on "accessories, hats, limiteds, hair combos, bundles, animation packs and more" for free, which is a massive value proposition compared to the base Roblox editor. Because the catalog syncs with your Roblox inventory, items you already own appear with a Owned tag, making it easy to spot what is new.
The community outfit feed is where the magic happens. With over 50 million community-created outfits, you can browse trending looks, filter by category, and load any outfit directly onto your avatar with one click. The feed updates constantly, so checking it daily reveals fresh styles from creators around the world. When you find an outfit you like, you can try it on to see how it looks on your body type, then save it to your in-experience wardrobe for later.
The outfit code system is the fastest way to share and load specific looks. Each published outfit gets a unique code, and entering that code instantly applies the full outfit to your avatar. The official Catalog Avatar Creator website confirms that the game is available on Windows, MacOS, iOS, Android, Xbox, PlayStation, and Meta Quest, so the outfit code system works identically across every platform.
Here is a breakdown of the main browsing modes and when to use each: Catalog sorts every item by category (Hair, Faces, Shirts, Pants, Shoes, and Accessories) with a dedicated search bar for filtering by name or color, while Community Outfit Feed surfaces full looks uploaded by other players, letting you preview an entire outfit before committing to individual piece purchases. For example, if you are hunting a specific pair of dark-wash jeans for a casual fit, the Catalog’s color filter narrows results instantly; conversely, when you are unsure what top pairs well with those jeans, the Feed’s "Copy to Avatar" button lets you load a complete community-created look and then swap out individual pieces—saving you the trial-and-error of mixing and matching from scratch. Use the Catalog for targeted item hunting and the Feed for style inspiration or full-look replication.
-
Search mode: Best when you know exactly what item you want, because the search bar returns precise results with partial-match support.
-
Category browsing: Ideal for exploring, since you can scroll through hats, hair, shirts, pants, and accessories without a specific target.
-
Community feed: Perfect for discovering complete looks, because you can load a full outfit and then tweak individual pieces.
-
Outfit codes: The fastest way to replicate a specific look shared by a friend or creator, since one code loads everything at once.
Building Your Avatar in the Editor Step by Step
Now that you understand the browsing tools, it is time to build an actual avatar. The editor gives you full control over every slot, from hats and hair down to shirts, pants, and shoes, plus accessory slots for glasses, neck chains, and more. The process follows a logical order that prevents you from wasting time on pieces that clash with your base body type.
Start by selecting your body type and proportions, because everything else layers on top of that foundation. The editor includes sliders for adjusting height, width, and head size, and these changes affect how clothing fits. A common mistake is building an outfit first and then adjusting body proportions, which forces you to re-check every item for clipping. Instead, set your body scale first, then move on to clothing.
Start by locking in the base body (torso, legs, arms) and head shape from the default library, since these define your collision bounds and animation rig — swapping them later forces you to re-tune every attached accessory. Next, layer on the face (eyes, mouth, nose) and hair, then apply the skin tone and any body markings before touching clothing; this order prevents clipping issues where a jacket or pants would otherwise obscure facial details you're still adjusting. Finally, add props and effects last, as they're purely cosmetic and won't affect the underlying rig — a sequence that keeps your Catalog Avatar Creator walkthrough efficient and avoids redoing work.
-
Set body proportions using the sliders in the editor, since this determines how all clothing fits.
-
Choose a hair style that matches the vibe you are going for, because hair frames your entire avatar.
-
Add a hat or head accessory next, since these interact directly with your hair and face.
-
Pick a shirt and pants that coordinate with your hair color and overall theme.
-
Layer accessories like glasses, neck chains, and back items to add personality.
-
Select shoes that complete the silhouette and match your color palette.
-
Preview the full look in the editor, rotating the camera to check for clipping issues.
The try-on system updates your avatar instantly, which makes comparison shopping painless. When you are deciding between two similar hats, click one, look at it, then click the other, and the switch happens immediately. This real-time feedback loop is what separates Catalog Avatar Creator from the clunky base Roblox editor, and it is the reason the experience won the Best Use of Fashion award twice.
Saving Avatars and Syncing to Your Roblox Account
Once you have built a look you love, saving it correctly is the difference between keeping it forever and losing it on the next session. The editor offers two save options: saving to your in-experience wardrobe and saving directly to your Roblox avatar. The in-experience save keeps the outfit stored locally so you can switch back to it anytime, while the Roblox save overwrites your actual avatar across the entire platform.
The official game page confirms that "all purchases made in-game will be available in your Roblox inventory & can be used in all games," which means buying an item inside Catalog Avatar Creator permanently adds it to your account. This is a crucial detail because it means you are not spending Robux on items that only exist inside one experience. Every hat, shirt, or animation pack you buy here is yours everywhere.
For players who want to manage multiple looks, the wardrobe system lets you save unlimited outfits and switch between them with a single click. This is especially useful for creators who maintain different looks for different occasions, like a formal outfit for events and a casual streetwear look for everyday play. The Catalog Avatar Creator official Roblox group has over 39.6 million members, and the community regularly shares outfit codes for new looks.
Local Save writes your avatar data directly to your device's storage, making it the fastest option for quick edits or offline work—but it stays locked to that machine. Cloud Save, by contrast, uploads your creation to Roblox's servers and links it to your account, so you can pull it up on any PC running Catalog Avatar Creator. Use Local Save when you're still iterating on a test avatar and don't want to clutter your profile; switch to Cloud Save only after you've finalized the look, since syncing overwrites your previous cloud version with no rollback option.
| Save Method | Where It Goes | Best For |
|---|---|---|
| In-experience wardrobe | Stored inside Catalog Avatar Creator | Testing multiple looks before committing |
| Roblox avatar save | Overwrites your platform-wide avatar | Finalizing a look you want everywhere |
| Outfit code publish | Creates a shareable code | Sharing your look with the community |
| Screenshot save | Captures the preview image | Documenting your style evolution |
Unlocking the Outfit Designer Role and Publishing Outfits
The Outfit Designer role is the main progression goal for most players, and it unlocks when one of your published outfits reaches 100,000+ try-ons according to the official group page. This is a significant milestone that requires both a great outfit and effective promotion, because the try-on count only grows when other players load your look. The role grants recognition within the community and signals that your design skills are legit.
Publishing an outfit is straightforward: build your look in the editor, click the publish button, and the game generates a unique outfit code. That code becomes your shareable link, and every time another player enters it, your try-on count increases. The community feed also surfaces popular outfits, so a well-designed look can gain traction organically if it catches the algorithm's attention.
To maximize your chances of hitting the 100,000 try-on threshold, focus on these strategies that community creators report working: prioritize publishing outfits with broad Catalog avatar appeal (everyday wear and streetwear) over niche costume pieces, since high-traffic search terms like "jeans" and "hoodie" drive consistent try-on volume. Additionally, batch-publish 5–10 outfits in a single session to maintain a steady stream of new items in the Outfit Designer queue, as the algorithm appears to boost fresh uploads with a temporary visibility window that decays within 48 hours.
-
Design for trends: Pay attention to what styles are popular in the community feed and create variations that fit those trends.
-
Use cohesive color palettes: Outfits with 2-3 matching colors perform better than random clashing combinations.
-
Include rare or limited items: Looks featuring hard-to-get items attract curiosity and more try-ons.
-
Share your code actively: Post your outfit code in the official group and on social media platforms.
-
Refresh your designs regularly: The feed rewards fresh content, so publishing new outfits keeps you visible.
The UGC Creator role is a separate progression path that unlocks by publishing a UGC Store, which lets you sell your own items to other players. This is a more advanced goal that requires understanding the creator economy, but the official group page confirms it is a distinct role from Outfit Designer. If you are serious about becoming a creator, the step-by-step guide breaks down the full progression from new player to established designer.
Advanced Tips for Faster Avatar Building
Once you have the basics down, these advanced techniques will cut your build time in half and produce better results. The first trick is mastering the randomize button, which generates a complete outfit from random catalog items. While the results are often chaotic, randomizing can spark ideas for color combinations or item pairings you would not have considered otherwise. Many creators use randomize as a starting point and then refine the look piece by piece.
The second technique is using the favorite system to build a curated list of items you like. When you favorite an item, it appears in a dedicated tab, so you can quickly assemble outfits from your personal collection without re-searching the entire catalog. This is especially useful for limiteds and expensive items you want to revisit across multiple outfit builds. The avatar customization guide covers the favorite system and randomize feature in more detail.
The third advanced tip is layering items strategically to create depth. The editor supports multiple accessory slots, so you can stack a hat, glasses, and a neck chain simultaneously. The key is choosing pieces that complement rather than compete, and checking for clipping by rotating your avatar in the preview. Community creators report that the best outfits use 3-5 layered accessories to achieve visual richness without looking cluttered.
Finally, learn to use the outfit code system as a learning tool. When you load a popular outfit with a code, study how the creator combined colors, textures, and accessories. Break down the outfit piece by piece to understand why it works, then apply those principles to your own designs. This reverse-engineering approach is how many top creators developed their skills, and it is accessible to anyone willing to study the community's best work.
Frequently Asked Questions
What is the fastest way to complete the Catalog Avatar Creator walkthrough?
The fastest path is to focus on the core loop: search for items, try them on, buy what you like, and save your avatar. Skip the community feed until you have a basic look established, then use outfit codes to explore popular styles. Most players complete the essential walkthrough in under 30 minutes.
How do I enter outfit codes in Catalog Avatar Creator?
Click the outfit code icon in the toolbar, type the code into the entry field, and press enter. The game instantly loads the full outfit onto your avatar. You can then save it to your wardrobe or modify individual pieces. Codes are case-sensitive, so enter them exactly as shared.
What does the Outfit Designer role require?
The Outfit Designer role unlocks when one of your published outfits reaches 100,000+ try-ons. You need to publish an outfit, share the code actively, and design looks that appeal to the community. The role is verified through the official Roblox group.
Can I use items I buy in Catalog Avatar Creator in other games?
Yes, every item you purchase inside the experience syncs to your Roblox inventory and works in all games. The official game page confirms that purchases are available platform-wide. This makes the experience a smart place to buy accessories you want to use everywhere.
Is Catalog Avatar Creator available on console?
Yes, Catalog Avatar Creator is available on console. The official website confirms support for Xbox and PlayStation alongside Windows, MacOS, iOS, Android, and Meta Quest. The interface adapts per platform, but outfit codes and the 50M+ community feed work identically across all devices.