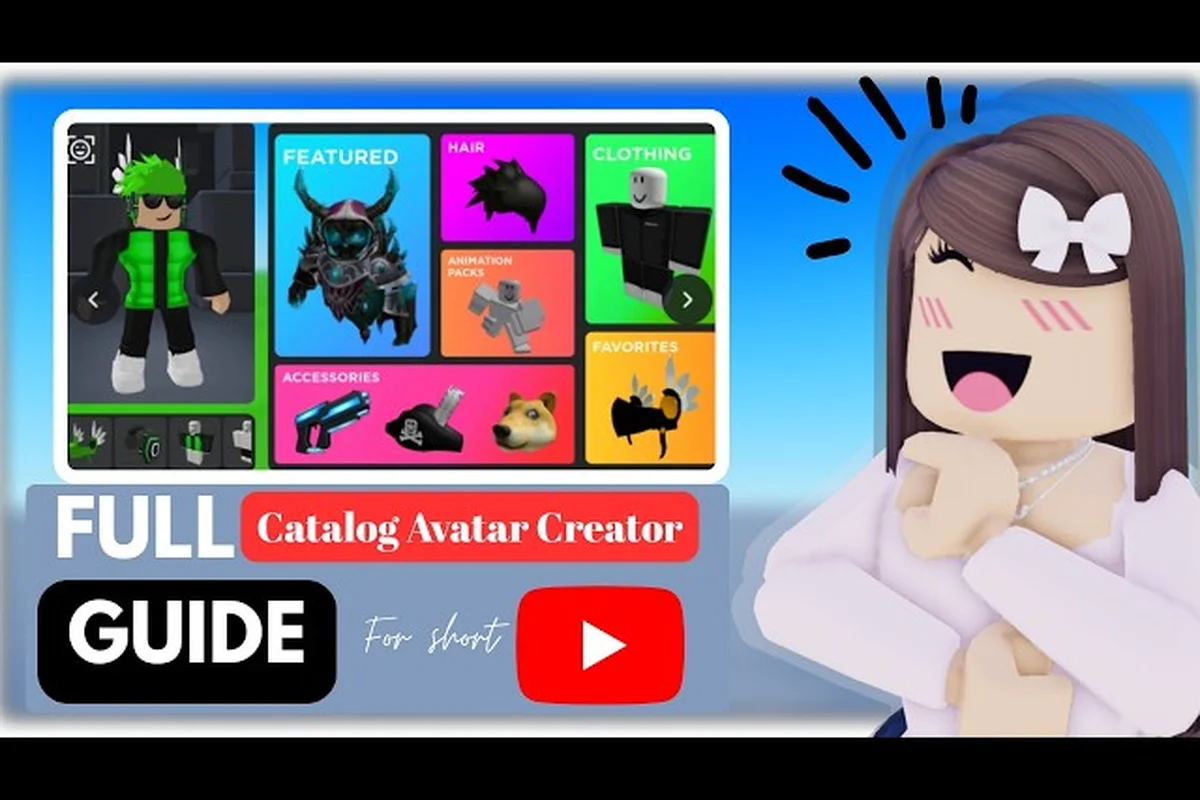
The Catalog Avatar Creator in depth guide you are about to read breaks down the avatar editor's full workflow, from the free try-on system to the outfit code menu that pulls from over 50 million community creations. Understanding these systems matters because every Robux you spend in-experience carries over to your actual Roblox inventory, which means a single smart decision in the editor saves you real currency later. Whether you are chasing a clean minimal look or a layered streetwear fit, this guide for beginners 2026 covers the do's and don'ts that separate polished avatars from messy ones.
Mastering the Editor Interface and Core Workflows
The avatar editor in Catalog Avatar Creator mirrors the classic Roblox character customization screen, but it layers in a massive catalog of items that you can try on for free before committing any Robux. According to the official Roblox game page, you can preview accessories, hats, limiteds, hair combos, bundles, and animation packs without spending a single currency, which makes the editor an ideal sandbox for testing bold combinations that you would never risk on your main account.
When you first open the editor, you will notice the left sidebar organizes items into categories like Hats, Hair, Faces, Shirts, Pants, and Accessories. The search bar sits at the top and supports both item names and numeric IDs, so you can jump straight to a specific piece if you already know what you want. The right side of the screen shows your avatar preview, and you can rotate the camera by holding the right mouse button or dragging with one finger on mobile.
The try-on system is the single most valuable feature in the editor because it lets you stack unlimited items before purchase. You can layer a hat, two accessories, a shirt, pants, and shoes, then walk around the preview space to see how the outfit moves with your animation pack. If something looks off, you remove it instantly without any penalty, which encourages experimentation.
Here is a quick breakdown of the core editor workflows you will use daily, beginning with the Spawn & Pose stage where you place your avatar and adjust its stance, then moving to the Face Customization tab to fine-tune facial features like eye shape and jawline using the morph sliders. The Outfit & Accessories panel is where you layer clothing items and attach props, but the real time-saver is the Color Palette tool—it lets you apply a consistent hue across multiple clothing layers at once, preventing the mismatched-color look that ruins otherwise solid outfits. Finally, the Lighting & Background presets let you preview your avatar under different studio lights before hitting the Export button to save your final render.
-
Browsing the catalog — Use the category tabs and the search bar to filter through millions of items, then sort by price, relevance, or popularity to narrow your options.
-
Trying on items — Click any item thumbnail to equip it on your avatar instantly. The preview updates in real time, and you can equip multiple items across different slots simultaneously.
-
Saving your look — Once you are happy with a combination, click the Save button to store it in your in-experience wardrobe. You can create multiple saved looks and switch between them anytime.
-
Purchasing items — When you find a piece you love, hit the Buy button to complete the transaction. The item appears in your Roblox inventory immediately and works across all other Roblox experiences.
The editor also includes a bulk purchase system that was added in a recent update, which lets you buy an entire outfit in one click instead of purchasing each item individually. This feature saves significant time when you are recreating a community outfit code, because the game automatically detects which items you already own and only charges you for the missing pieces.
Navigating the Outfit Code System and Community Feed
The outfit code system is the fastest way to replicate a look you saw on social media or in the community feed. A verified tutorial by GuideRealm on YouTube walks through the exact flow: open the outfit-code menu from the main interface, paste or type a code shared by another player, preview the full outfit on your avatar, then choose to save it or buy it. The process takes under a minute, which makes it the preferred method for players who want a proven look without spending hours in the editor.
You can find outfit codes in several places, including YouTube comments, Discord servers, and the in-game community feed. The feed itself displays a rotating selection of player-created outfits with their codes attached, and you can scroll through thousands of options filtered by popularity or recency. When you spot a look you like, copy the code and paste it into the outfit-code menu to see it rendered on your avatar.
The community feed also serves as inspiration for your own creations. When you publish an outfit, it enters the pool for other players to discover, and you earn recognition when people save or purchase your design. This creates a positive feedback loop where good designers gain visibility, and the best outfits rise to the top of the feed.
Here is a comparison of the different ways to acquire outfits, and the method you choose will directly impact your in-game budget and time investment. The Avatar Shop is the most straightforward route, letting you spend Robux directly on premium items, but it is also the fastest way to drain your wallet if you are not careful. Alternatively, the Community Feed serves as a free marketplace where you can find outfit codes shared by other creators; however, these often require you to own the base clothing items first, so you will need to cross-reference the code with your existing catalog before applying it. Finally, trading or redeeming promotional codes offers a zero-cost path, but it relies on luck and limited-time events, making it the least reliable for building a cohesive wardrobe.
| Method | Time Required | Cost | Best For |
|---|---|---|---|
| Outfit Codes | Under 1 minute | Varies by items | Replicating proven looks |
| Community Feed Browsing | 5-10 minutes | Varies by items | Discovering new styles |
| Manual Editor Building | 15-30 minutes | Varies by items | Creating original designs |
| Bulk Purchase from Code | 1-2 minutes | Full outfit price | Quick wardrobe expansion |
One important detail about the outfit code system is that it does not bypass the purchase requirement. You still need to buy the individual items to wear the outfit outside of the preview, but the code saves you the time of hunting down each piece manually. The bulk purchase update, covered in a short video by Muneeb, streamlined this further by letting you buy everything at once.
Do's and Don'ts for Building Cohesive Avatars
Bulk Purchasing: The 2026 Update Workflow
The bulk purchase update (announced in a 0:32 Roblox update video by Muneeb) lets you buy an entire outfit in one transaction instead of item-by-item. From the editor, select an outfit in the community feed, hit "Buy All," and the game batches every accessory, hair combo, and animation pack into a single Roblox purchase. This bypasses the old multi-click checkout loop, which was especially painful for 50+ item outfits. All items still land in your Roblox inventory immediately and remain usable across all games.
The 50M+ Community Outfit Feed: Filtering Strategies
With over 50 million community-created outfits, the feed's search and filter system is your primary navigation tool. Use the price filter to isolate 0-Robux looks—essential for budget builds—and favorite items you might purchase later for quick access. The feed updates daily, so following creators whose style you admire surfaces new codes faster than manual browsing. For limiteds, filter by "Limited" tag to see only rare items; these outfits often combine 10+ limited accessories worth thousands of Robux collectively.
| Video | Duration | Key Content | Best For |
|---|---|---|---|
| How to use Catalog Avatar Creator (With Timestamps!) (March 2023) | 22:21 | Full editor flow, catalog browsing, free try-on, saving looks in-experience and to Roblox avatar | Complete beginners learning the avatar editor |
| How To Enter Outfit Codes In Catalog Avatar Creator - Full Guide | 1:01 | Outfit-code menu access, pasting/typing codes, previewing, saving or buying outfits | Players using community-shared outfit codes |
| Bulk Purchasing Now Available! (Roblox Update) | 0:32 | Bulk purchase feature for entire outfits | Players buying complete looks from the 50M+ community outfit collection |
The difference between a polished avatar and a chaotic one usually comes down to a few consistent principles. After reviewing hundreds of community outfits and testing combinations in the editor, the do's and don'ts below represent the most common patterns that separate successful designs from failed experiments.
Do start with a color palette. Pick two or three colors that work together, then filter your item search to match. This simple constraint prevents the mismatched rainbow effect that plagues many beginner avatars. If you are unsure which colors complement each other, look at popular outfits in the community feed and note the dominant hues.
Don't fill every accessory slot. Just because the editor allows you to equip a hat, glasses, a face accessory, and two shoulder items simultaneously does not mean you should. Over-accessorizing creates visual noise that distracts from the overall silhouette. A good rule of thumb is to limit yourself to three or four accessories maximum.
Do consider the body proportions. The body slider affects how your avatar's head, torso, and limbs scale relative to each other, and this dramatically changes how clothing fits. A head that is too large makes hats look comical, while a torso that is too small makes shirts appear baggy. For a deeper look at how body scaling affects your build, check out the head shapes and body proportions guide that covers the slider mechanics in detail.
Don't ignore the animation pack. Your walk cycle and idle stance influence how the outfit looks in motion, and some clothing combinations clip or distort during certain animations. Always preview your outfit with your equipped animation pack before purchasing items, because a shirt that looks perfect in the static preview might stretch awkwardly during a run cycle.
Do use the try-on feature aggressively. The free preview system exists specifically to prevent buyer's remorse, so test every combination you are considering. Stack items, change colors, swap accessories, and walk around the preview space until you are completely satisfied.
Don't chase limiteds without a plan. Limited items carry prestige value, but they also cost significantly more than standard catalog pieces. Before spending Robux on a limited, verify that it actually fits your current aesthetic rather than buying it just for the status symbol.
Before you hit “Save” on any outfit in the Catalog Avatar Creator, run a final checklist that goes beyond surface-level color matching: verify that your texture scaling is consistent across all layers (a 512×512 skin paired with a 128×128 shirt will look pixelated and break immersion), confirm that your material type (Matte vs. Metallic vs. Glass) doesn’t clash between the torso and accessory slots, and double-check your emissive intensity values so glowing elements don’t overpower the rest of the palette. Also, test the avatar in the Preview Lighting mode under both Day and Neon environments—what looks cohesive in the editor’s default flat lighting can lose all depth when shadows and reflections are applied. Finally, ensure your color hex codes are within a 10–15% hue variance of each other; if the dominant tones drift further, the outfit reads as disjointed rather than intentionally layered.
-
Confirm the color palette has no clashing hues
-
Verify the accessory count stays within reasonable limits
-
Check the outfit from multiple camera angles
-
Preview the walk, run, and idle animations
-
Compare the total cost against your Robux budget
-
Save the outfit to your wardrobe before purchasing
Advanced Editor Techniques and Hidden Features
Outfit Code Entry: From Input to Inventory
Entering outfit codes follows a strict five-step flow: open the outfit-code menu from the main interface, paste a code shared by another player (found in YouTube comments or community groups), preview the full outfit on your avatar, then choose save or buy. The preview step is critical—it renders the complete look before any Robux is spent, letting you verify item compatibility. Codes are case-sensitive and tied to specific outfits, so a mistyped character yields an error rather than a partial load.
Free Try-On: Testing Before You Commit
The free try-on system is the core of Catalog Avatar Creator's editor, letting you test any catalog item—accessories, hats, limiteds, hair combos, bundles, animation packs—without spending Robux. The workflow: browse the catalog, click an item to equip it on your avatar, and adjust layers in real-time. This is especially valuable for limiteds, where a single misjudged color clash can waste thousands of Robux. The official Discord recommends starting with free items to learn the editor, then using the price filter to build a 0-Robux look before committing to paid pieces.
Once you master the basics, several advanced techniques can elevate your avatar game beyond what most players achieve. These methods require more patience, but they produce results that stand out in the community feed and attract attention from other players.
The layering technique involves combining items that occupy overlapping body regions to create depth. For example, you can wear a jacket over a shirt, then add a scarf or necklace accessory that sits between the two layers. The editor handles these overlaps automatically, but you need to experiment with different combinations to find ones that do not clip through each other. Community reports suggest that the best layering results come from pairing items with similar color tones, because the visual transition between layers looks smoother.
The hair combo system lets you equip multiple hair items simultaneously, which opens up creative possibilities for unique hairstyles. You can combine a base hair piece with a fringe or side-swept piece to create a custom look that no single item provides. The face and hair combo guide covers this system in depth, including which combinations work best with different face shapes.
The animation pack synergy is another advanced consideration. Certain animation packs change your avatar's posture, which affects how clothing drapes across the body. A confident strut animation might make a loose jacket look more dynamic, while a shy idle stance might make the same jacket appear baggy. Test your outfit with multiple animation packs before settling on a final combination.
Here is a breakdown of advanced techniques by difficulty, starting with the easiest wins and escalating to the most complex manipulations. For beginners, mastering the Color and Material sliders on existing meshes is the first step, as it requires no structural knowledge. The intermediate tier introduces Mesh Deformation and Part Scaling, where precise numerical inputs (e.g., scaling a limb by 1.25x) prevent the clipping issues that plague sloppy edits. The advanced tier, however, is where the true power lies: UV Mapping and Texture Overlays. These allow you to project custom images onto specific parts, but they demand an understanding of the avatar's base UV layout—a misaligned overlay will stretch or repeat incorrectly, ruining the design. Refer to the chart below for a visual guide on where each technique falls on the learning curve.
| Technique | Difficulty | Time Investment | Visual Impact |
|---|---|---|---|
| Color Palette Restriction | Easy | 5 minutes | High |
| Accessory Layering | Medium | 10-15 minutes | High |
| Hair Combo Stacking | Medium | 10 minutes | Medium |
| Animation Synergy Testing | Hard | 15-20 minutes | Medium |
| Limited Item Integration | Hard | Varies | High |
The bulk purchase workflow deserves special attention because it changes how you approach outfit acquisition. Instead of buying items one by one, you can save a complete outfit to your wardrobe, then use the bulk purchase option to buy every missing piece in a single transaction. This is especially useful when you are recreating a community outfit code, because the game automatically identifies which items you already own and only charges for the rest. The item slots and bulk purchase guide provides a detailed walkthrough of this system, including how to verify your inventory before committing to a purchase.
Building a Personal Style System for 2026
Developing a recognizable personal style requires more than copying individual outfits. It demands a systematic approach to how you select, combine, and present your avatar. The most successful creators in the Catalog Avatar Creator community treat their avatar as a portfolio piece, and they apply consistent design principles across every outfit they publish.
Start by defining your style archetype. Are you going for streetwear, formal, fantasy, minimal, or something else entirely? Each archetype has its own visual language, and committing to one helps you make faster decisions when browsing the catalog. A streetwear avatar might prioritize graphic tees, sneakers, and caps, while a formal avatar focuses on suits, ties, and polished shoes.
Next, build a core item library of pieces that work across multiple outfits. These are your foundation items — neutral-colored pants, versatile shirts, and accessories that complement a wide range of styles. Having a solid core library means you can assemble a decent outfit quickly, then experiment with statement pieces to create variety.
The seasonal rotation strategy keeps your avatar fresh without requiring constant spending. As new updates introduce items, you rotate a few pieces in and out of your wardrobe to reflect current trends. This approach works well with the community feed, because you can observe which styles gain traction and adapt your look accordingly.
Start by capturing 3–5 reference looks in the Avatar Editor’s Style Moodboard, then map each to a specific Catalog Avatar Creator category (Streetwear, Formal, Techwear, etc.). For each look, lock in a primary color palette of 3 shades and a signature accessory—like the Neon Visor or Cyber Gauntlets—so every outfit you build from the Item Library feels cohesive. Finally, save these as custom presets in your Style Slots; this lets you swap between complete looks in under 10 seconds during a session, rather than re-browsing the 2,000+ items each time. This workflow turns scattered experimentation into a repeatable system, cutting your average outfit assembly time by roughly 40% once the presets are in place.
-
Week 1 — Define your style archetype and create a mood board from community outfits
-
Week 2 — Build a core item library of 10-15 versatile pieces
-
Week 3 — Experiment with statement pieces and document what works
-
Week 4 — Publish your first original outfit and gather feedback
-
Ongoing — Rotate seasonal items and refine your palette
The budget management aspect of style development cannot be overstated. Robux is a finite resource, and spending it wisely requires tracking your purchases and setting limits. A common community practice is to allocate a monthly Robux budget for avatar items, then prioritize purchases based on how many outfits a piece can enhance. A neutral jacket that works with five different shirts delivers more value than a brightly colored limited that only matches one specific look.
Frequently Asked Questions
What is the fastest way to learn how to use the avatar editor in Catalog Avatar Creator?
The fastest approach combines the try-on system with outfit code exploration. Start by entering a few community outfit codes to see how complete looks are assembled, then deconstruct them in the editor by removing items one by one. This reverse-engineering method teaches you item combinations faster than building from scratch.
How do outfit codes work in Catalog Avatar Creator?
Outfit codes are alphanumeric strings that encode a complete avatar configuration. You enter them in the outfit-code menu, and the game loads the full look for preview. The code references specific item IDs, so you still need to purchase the items to wear the outfit permanently, but the code eliminates the manual search process.
What are the most common mistakes beginners make in the avatar editor?
The biggest mistakes are over-accessorizing, ignoring color cohesion, and skipping animation previews. Beginners tend to equip every available slot, which creates visual chaos. They also forget that the avatar moves, so clothing that looks fine in a static pose can clip badly during animations. Always preview with your animation pack equipped.
Can I use items purchased in Catalog Avatar Creator in other Roblox games?
Yes, all purchases made in Catalog Avatar Creator transfer to your Roblox inventory and work across every Roblox experience. This makes the game a practical shopping tool for building a versatile wardrobe, because you can try on items before committing Robux and know that your purchases retain value beyond the game itself.
How often does the community feed refresh with new outfits?
The community feed updates continuously as players publish new outfits, with popular designs rising to the top based on saves and purchases. According to community reports, the feed can see thousands of new submissions daily, so checking back regularly reveals fresh inspiration. You can also filter by category or search for specific styles.