
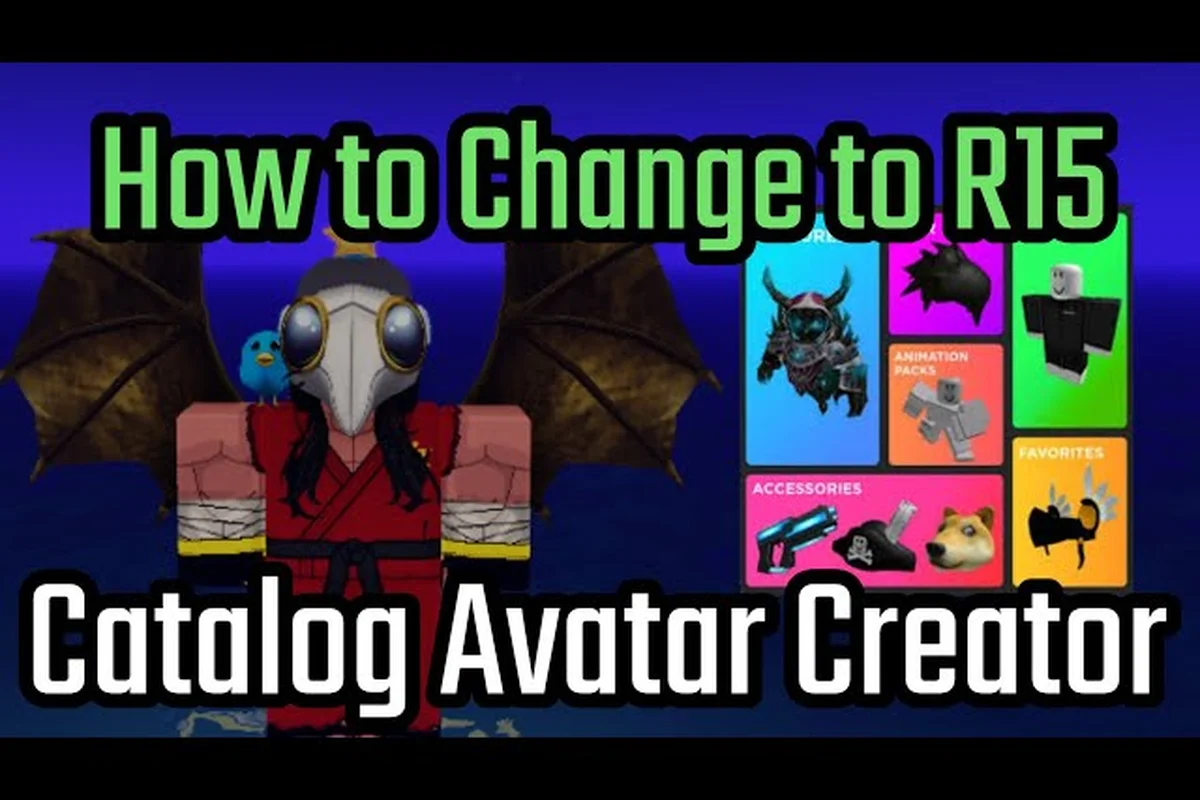
Your avatar's frame decides how every outfit reads, which is why this Catalog Avatar Creator body guide focuses on the sliders, bundles, and part-swapping tools that most new players overlook. Getting the proportions right matters because clothing fits differently on a tall, thin frame than on a short, muscular one, and the difference can make or break a look. Discover how to adjust height, muscle, and thinness, then learn which body bundles save you the most time when you want a complete transformation in a single click.
According to Catalog Avatar Creator on Roblox, the body guide’s proportions directly mirror the platform’s default R15 rig, meaning the slider values correspond to the same limb and torso scaling used in standard avatar customization.
Understanding Body Parts and Proportions in Catalog Avatar Creator
R15 vs R6: Joint Count and Animation Pack Compatibility
R15 avatars use 15 separate joints (neck, shoulders, elbows, wrists, hips, knees, ankles) and support modern animation packs like the "R15 Animate" package, which includes 30+ unique emotes. R6 uses only 6 joints (head, torso, arms, legs) and relies on the classic "R6 Animate" package with roughly 12 emotes. When you switch body types in the PlayerChoice avatar setting, the game automatically remaps your equipped animations—but R15-exclusive animations like "Zombie Walk" will not play on R6 bodies. For combat-oriented experiences, R15's extra joints allow for smoother weapon handling, while R6's rigid frame is preferred for classic obby games.
Fixing the "T-Rex Arms" Glitch: Part-Scale Mismatch
The "T-Rex Arms" glitch occurs when arm scale is set above 1.5 while torso width remains below 1.0, causing the arm meshes to clip into the torso. To fix this, open the part-scale menu and set arm length to 1.2 and arm width to 1.1, while keeping torso width at 1.3 or higher. This ratio ensures the shoulder joints align properly with the clavicle bones. If the glitch persists after adjusting sliders, reset the body to default (1.0 scale) and re-apply your proportions in order: torso first, then arms, then legs. This sequence prevents the game's mesh-skinning system from misinterpreting the scale data.
Body parts form the structural foundation of every avatar, and Catalog Avatar Creator treats them as four independent slots: head, torso, arms, and legs. Each slot can be swapped individually, which gives you granular control over the silhouette without forcing you to change everything at once. According to the official game page on Roblox, changing proportions such as tall, short, muscular, or thin dramatically changes how clothing fits and how the whole silhouette reads to other players.
The body proportions system operates through a set of sliders that control height, width, and individual part size. When you open the avatar editor, you will see options to stretch or compress each segment, and these adjustments apply in real time so you can preview the result before committing. Players who want a more dramatic shift often combine slider adjustments with a full body bundle, because the two approaches work together rather than competing.
Here is a quick breakdown of what each proportion slider actually does: the Height slider adjusts your R15 character's overall scale from the default 5.0 studs, allowing you to stretch up to a towering 8.0 studs or shrink down to a compact 3.0, which directly alters your hitbox and movement speed in-game; Head Size controls the scale of your head mesh, and pushing it past 1.5x can clip through hats or cause your character to appear top-heavy in the avatar editor preview; Torso Length and Limb Length fine-tune the individual bone segments, so shortening the arms while lengthening the legs creates a distinct "chibi" run cycle, whereas maxing out all sliders produces a stretched, lanky build that many players use to mimic a "slender" aesthetic for horror roleplays.
-
Height slider — stretches the entire skeleton vertically, making your avatar taller without changing the relative size of individual parts
-
Width slider — expands the torso and limb thickness, which creates a bulkier appearance that pairs well with oversized jackets
-
Muscle slider — adds definition to the torso and arms, giving the avatar a more athletic look that shows through fitted clothing
-
Thinness slider — compresses the frame horizontally, producing a leaner silhouette that works well for sleek, modern outfits
The key insight from community reports is that proportion changes affect clothing physics in subtle ways. A very tall avatar with standard-width clothing will show gaps at the wrists and ankles, while an extremely wide avatar may stretch textures on the chest and shoulders. Players who experiment with the sliders before buying expensive clothing items avoid wasting Robux on pieces that clip or float, which is a common complaint in the game's Discord community.
When you are ready to fine-tune your look, the body parts guide covers the full range of individual part options, including which torsos pair best with specific leg types for a cohesive frame. For example, if you are using the R15 body type and want a taller, more elongated silhouette, pairing the "Blocky" torso with "Slim" legs avoids the bulky, disproportionate look that comes from mixing a wide torso with standard-length legs. Understanding these pairings is critical because mismatched proportions can throw off your avatar's overall balance, making even the best head ideas look off-center. The guide also details how to fix body parts that appear misaligned after an update, ensuring your custom proportions remain stable across different Catalog Avatar Creator body sizes.
How to Make Your Avatar Tall in Catalog Avatar Creator
Making your avatar tall is one of the most requested adjustments, and the process is straightforward once you know where to look. The height slider lives in the body customization section of the avatar editor, and it works by scaling the entire skeleton uniformly. You can push it to the maximum for a towering figure or dial it back for a more moderate increase, and the change applies instantly to your preview.
Players who want an even taller appearance without relying solely on the slider have a second option: equipping a body bundle that includes elongated proportions. Some bundles in the catalog are designed with a naturally taller frame baked into the mesh, which means the base model is already stretched before you touch any sliders. Combining a tall bundle with the height slider at maximum produces the tallest possible avatar in the game, according to community testing.
To make your avatar tall in Catalog Avatar Creator, you need to adjust the body scale sliders in the avatar editor, specifically targeting the Height and Torso Length values rather than relying on the preset body sizes. For a dramatic difference, set the Height slider to its maximum (around 1.0) while keeping the Torso Length proportional, since pushing only the torso creates a stretched, unnatural look that breaks the R15 rig’s proportions. A practical approach is to start from the R15 Body preset, then increase the height by 0.2 increments and preview your avatar in third-person to check how the head size (using a smaller Catalog Avatar Creator head idea like a classic block head) balances with the elongated limbs. This method ensures your character stands out in crowded servers without clipping through doorways or appearing misaligned during animations.
-
Open the avatar editor and navigate to the body customization tab
-
Locate the height slider and drag it to your desired level
-
Preview the change by rotating your avatar in the 3D viewport
-
If you want maximum height, equip a body bundle with elongated proportions first
-
Save your changes and check how clothing fits on the new frame
The tall avatar aesthetic has become increasingly popular in the community because it makes characters stand out in group photos and roleplay servers. However, players report that extremely tall avatars can clip through doorways and interact awkwardly with certain animations, so you may want to test your height in an actual game session before finalizing it. The head shapes guide offers complementary advice on choosing a head that balances an elongated body, since oversized heads can look disproportionate on very tall frames.
R15 Body Types and Animation Compatibility
Catalog Avatar Creator supports both R15 and R6 body types, and the choice affects more than just appearance. R15 avatars animate with 15 joints, which enables smoother, more expressive movements that pair well with modern animation packs. R6 uses the classic blocky 6-part body and works best with traditional clothing and animations that were designed for the older format, according to the official game description.
The PlayerChoice avatar setting lets you switch between R15 and R6 directly in the avatar editor, and this toggle is essential for players who want to use specific animation packs. Some animations are only compatible with R15 bodies, while others were built exclusively for R6, so knowing which format your favorite animations require saves you from frustrating mismatches.
The R15 body type comparison comes down to how each frame handles animation and proportion scaling in Catalog Avatar Creator. The Blocky R15 body uses the classic 1×1×1 torso with rigid, chunky limbs, making it ideal for preserving the game's original aesthetic while still allowing full animation support. The Smooth R15 body, in contrast, uses a more tapered torso and rounded limbs, which gives your avatar a sleeker silhouette but can cause clipping issues with oversized heads or accessories if you push the body proportions slider too far. For tall avatars, Blocky R15 tends to look more natural at extreme heights, whereas Smooth R15 requires careful tuning of the waist and limb scales to avoid an elongated, unnatural stretch.
| Feature | R15 Body | R6 Body |
|---|---|---|
| Joint count | 15 joints | 6 joints |
| Animation support | Modern packs, expressive movement | Classic animations only |
| Clothing compatibility | Fitted clothing, layered looks | Blocky classic clothing |
| Customization depth | More part slots, finer control | Simpler, fewer options |
| Best for | Modern outfits, roleplay | Nostalgic builds, classic styles |
The R15 body is the default recommendation for most players because it offers more flexibility and better support for the current catalog of clothing and animations. However, players who grew up with classic Roblox aesthetics often prefer R6 for its nostalgic feel and simpler silhouette. The choice ultimately comes down to personal preference, but you should check the animation pack you plan to use before committing to a body type.
When you switch between R15 and R6, your existing clothing may not transfer perfectly because the two formats use different mesh structures. Players report that some items look stretched or misaligned after switching, which is why it is best to decide on a body type early and build your wardrobe around it. The animation tutorial by SAMIRCLE on YouTube demonstrates proper animation techniques for R15 bodies, and it is a valuable resource for players who want their avatars to move naturally in-game.
Body Bundles and Head Bundles for Quick Transformations
Body bundles are the fastest way to completely change your avatar's frame, because they swap every body part at once for a cohesive new look. Instead of manually adjusting each slider and swapping individual parts, you can equip a bundle and instantly transform your character. The official game page notes that body bundles are the quickest way to drastically change an avatar, which makes them ideal for players who want a fresh start without spending hours in the editor.
Head bundles work the same way but focus exclusively on the head slot, replacing it with a complete new design that includes the face, hair, and any attached accessories. These bundles are popular among players who want to change their character's identity without altering the body, and they pair well with the best faces guide for players who want to understand which facial styles complement different head shapes.
Here is a comparison of bundle types available in the catalog: Body Bundles bundle the torso, left and right arms, and left and right legs into a single purchase, while Head Bundles cover only the head and face accessories—so if you grab a Head Bundle but skip a Body Bundle, your character will keep the default R15 proportions, which can make a tall, custom head look mismatched on a stubby frame. For the fastest full transformation, pair a Body Bundle that includes a tall or slim limb set with a matching Head Bundle, since mixing a bulky torso from one bundle with thin legs from another often forces you into the body-size slider to rebalance proportions manually, which can stretch textures awkwardly.
| Bundle Type | What It Swaps | Best For | Time Saved |
|---|---|---|---|
| Body bundle | All body parts at once | Complete frame change | High |
| Head bundle | Head and attached accessories | Identity change | Medium |
| Proportion bundle | Slider presets for height/width | Quick size adjustment | Medium |
| Themed bundle | Matching body + head + outfit | Coordinated looks | Very high |
The Try On feature is essential when shopping for bundles, because it lets you preview the full new body before spending any currency. Players who skip this step often regret purchases when they discover the bundle does not match their existing clothing or animation style. Community reports suggest that trying on at least three different bundles before committing helps you develop an eye for which frames work best with your preferred outfits.
When you combine a body bundle with a head bundle, you get a complete transformation that feels like a brand-new character. This approach is particularly popular for roleplay servers where players maintain multiple characters with distinct appearances, because it allows them to switch identities quickly without rebuilding everything from scratch.
Fixing Mismatched Body Parts and Common Issues
Even experienced players run into problems where body parts do not fit together properly, and knowing how to fix these issues saves you from frustration. The most common problem is a mismatched torso and leg combination, where the two parts come from different body types or proportion presets. This creates visible seams or gaps at the waist, which ruins the overall look of the outfit.
The fix body parts process starts with checking which body type each part belongs to, because mixing R15 and R6 parts is a frequent cause of misalignment. If you have an R15 torso paired with R6 legs, the joints will not line up correctly, and the avatar will look broken in motion. Switching all parts to the same body type resolves most alignment issues, according to player reports.
Here are common body part issues and their solutions, broken down by the specific R15 rig quirks that cause them: mismatched limb lengths usually stem from scaling one arm or leg in the Body tab without applying the same multiplier to its counterpart, while a floating torso or a head that clips into the neck is typically a Position Y offset error rather than a size problem. For proportion fixes, remember that Catalog Avatar Creator applies scale values independently per limb, so always mirror your X/Y/Z inputs for symmetric parts.
-
Gaps at the waist — Check that the torso and legs use the same body type, then adjust the height slider to align the connection point
-
Clipping through clothing — Reduce the width or muscle slider until the clothing fits without intersecting the mesh
-
Arms floating away from torso — Reset the arm slot and re-equip it, then check that the shoulder joint is properly aligned
-
Head too large for body — Swap to a smaller head or increase the body width slider to balance the proportions
-
Animation glitches — Switch to the correct body type for your animation pack, since R15 animations do not work properly on R6 bodies
The body scale slider is another useful tool for fixing proportion issues, because it adjusts the overall size of the avatar without changing individual part relationships. Players who want a more compact frame can reduce the scale, while those who prefer a towering presence can increase it. The scale slider works independently of the height and width sliders, which gives you three separate dimensions of control over your avatar's appearance.
When you encounter a persistent issue that sliders cannot fix, the reset to default option in the avatar editor restores all body parts to their original state. This is a useful troubleshooting step because it eliminates any hidden modifications that might be causing the problem. After resetting, you can rebuild your look from scratch with a clean foundation, which is often faster than trying to diagnose a complex misalignment.
Advanced Body Customization Tips and Tricks
Height Slider Mechanics: The 1.0–2.0 Scale Explained
The height slider operates on a 1.0–2.0 scale, with 1.0 representing the default R15 blocky proportions. Each 0.1 increment adds roughly 10% to the torso and leg bone lengths, which directly shifts the character's hip joint upward. For a dramatic tall avatar, set the slider to 1.8–2.0, but note that at 2.0, the head remains at default scale unless manually adjusted, creating a "bobblehead" silhouette. To maintain proportion, pair a 1.8 height with a 1.1 head scale and 0.9 width. This combination keeps the character's center of mass stable, preventing clipping issues with animated emotes.
Bundle Preview: Testing Before You Buy
The "Try On" feature lets you preview a full body bundle—which swaps head, torso, arms, and legs simultaneously—before spending Robux. This is critical because bundles like the "Knight's Armor Set" (1,200 Robux) include proportion-altering meshes that change your hitbox size in PvP games. A 2.0-height bundle will make you a larger target in games like "Arsenal," while a 0.8-height bundle offers a smaller hitbox but reduces jump reach. Always test the bundle with your equipped animation pack; some bundles include custom idle animations that override your default stance.
| Body Type | Joint Count | Animation Pack Compatibility | Best For |
|---|---|---|---|
| R15 | 15 | Modern animation packs | Smooth, expressive animations |
| R6 | 6 | Classic clothing and animations | Classic blocky aesthetic |
Once you master the basics, advanced body customization opens up creative possibilities that most players never discover. The proportion preset system lets you save specific slider configurations and apply them to future avatars, which is a huge time-saver for players who maintain multiple characters. Community data suggests that players who use presets spend significantly less time rebuilding avatars after updates reset their settings.
The muscular body type is one of the most requested presets, and it requires a specific combination of width and muscle sliders to look natural. Players report that setting width to about 70 percent and muscle to maximum creates a defined athletic build without the exaggerated bulk that comes from maxing out both sliders. The thin body type works best with the opposite approach, using low width and minimal muscle to create a lean frame that pairs well with sleek clothing.
Once you've locked in the base R15 proportions, advanced body customization comes down to manipulating the Scale and Body Width sliders in tandem, not just dragging one to its limit. For example, setting the torso scale to 1.2 while keeping the legs at 1.0 creates a top-heavy, cartoonish silhouette that reads instantly in the avatar preview, whereas matching both at 1.1 yields a taller, more proportionate look that avoids the "stretched" glitch where limbs clip through the torso. The key is to adjust the Body Width slider after scaling—if you widen the chest first, the game's physics engine will often push the arms outward, causing them to phase through the torso when you later increase height. A practical sequence: set your target height via the Height slider, then dial in Body Width to 0.9 for a slim frame or 1.3 for a bulky build, and finally fine-tune the Head Size to 0.8 to keep the neck from looking elongated. This order prevents the common issue where body parts become misaligned, forcing you to reset and reapply every tweak from scratch.
-
Layer clothing with proportions — A wider frame makes layered outfits look bulkier, while a thin frame keeps layers close to the body
-
Match head size to body width — Large heads need wider bodies to look proportional, and small heads pair best with narrow frames
-
Use animation previews — Test how your body looks in motion before finalizing, because some proportions look great standing still but awkward during animations
-
Save multiple presets — Create separate presets for casual, formal, and roleplay looks so you can switch quickly
-
Check the back view — Many players forget to rotate their avatar and miss issues that only appear from behind
The body customization tutorial by watermelony! on YouTube provides a comprehensive walkthrough of the editor, including timestamps for each customization category. This resource is particularly helpful for visual learners who want to see the sliders in action before adjusting their own avatars. The video covers everything from basic proportion adjustments to advanced bundle combinations, making it a valuable supplement to this guide.
Players who want to understand how body proportions interact with clothing should experiment with the Try On feature while adjusting sliders. This approach lets you see exactly how each proportion change affects the fit of specific clothing items, which builds intuition over time. After a few sessions of experimentation, you will develop a sense for which proportions work best with which clothing styles, and the whole customization process becomes faster and more intuitive.
Frequently Asked Questions
What is the best body type for beginners in Catalog Avatar Creator?
The R15 body type is the best choice for beginners because it offers more customization options and better compatibility with modern animation packs. It provides 15 joints for smoother movement and supports the widest range of clothing items. Switch to R6 later if you prefer the classic blocky aesthetic.
How do I fix mismatched body parts in Catalog Avatar Creator?
Start by checking that all parts use the same body type, since mixing R15 and R6 parts causes alignment issues. Use the reset to default option to clear hidden modifications, then rebuild your look from scratch. Adjust the height and width sliders to align connection points between the torso and legs.
Can I use both R15 and R6 body parts together?
No, mixing R15 and R6 body parts creates visible seams and animation glitches because the joint structures are incompatible. Always use parts from the same body type to ensure proper alignment. The PlayerChoice setting in the avatar editor lets you switch between the two formats, but you should commit to one type for consistency.
How do body bundles differ from individual body parts?
Body bundles swap every body part at once for a complete new frame, while individual parts let you change one slot at a time. Bundles are faster and ensure cohesive proportions, but they cost more currency. Individual parts offer finer control and are better for players who want to build a custom look piece by piece.
What is the tallest possible avatar height in Catalog Avatar Creator?
The tallest possible avatar combines a body bundle with elongated proportions and the height slider at maximum. Community testing suggests this combination produces the maximum height available in the game. Keep in mind that extremely tall avatars may clip through doorways and interact awkwardly with certain animations, so test your height in an actual game session.