
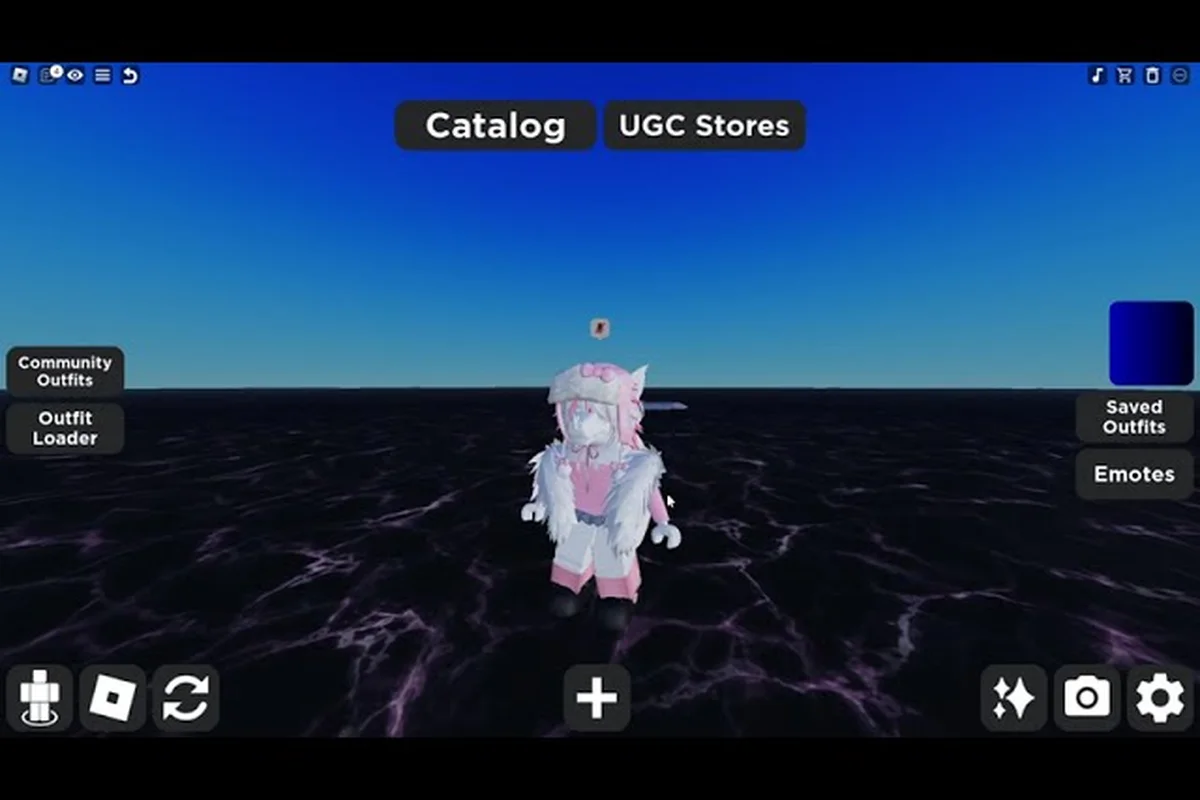
Getting Catalog Avatar Creator body customization right changes how every outfit sits on your avatar. A taller, thinner frame reads differently in clothing than a shorter, stockier one, which is why proportions matter before you commit to a look. This guide breaks down R15 versus R6 scaling, part-by-part value, and the combos that actually work.
Understanding Body Customization Fundamentals
Body parts are the frame of your avatar: head, torso, arms, and legs can each be swapped individually. Changing proportions dramatically changes how clothing fits and how the whole silhouette reads, according to the official Roblox experience page. The editor exposes height, width, and individual part size controls, so you can build a frame that matches your intended style.
How Body Scaling Works
The scaling system in Catalog Avatar Creator operates on a proportional multiplier model. When you adjust height, the engine scales the torso and legs together while keeping arm length relative to the new total. Width adjustments primarily affect the torso and shoulder region, which is why broad-shouldered avatars look more imposing in jackets and armor.
| Scale Parameter | Affected Parts | Visual Impact |
|---|---|---|
| Height | Torso, legs | Changes overall silhouette length |
| Width | Torso, shoulders | Alters how shirts and jackets drape |
| Head Size | Head only | Shifts facial prominence and hat fit |
| Limb Thickness | Arms, legs | Affects sleeve and pant tightness |
The classic body option locks these parameters to the original Roblox blocky proportions. Many players prefer this because classic clothing items were designed around those exact dimensions, so nothing clips or stretches unexpectedly. Modern scaling gives you more creative freedom but requires testing each outfit against your chosen frame.
Why Proportions Beat Individual Swaps
Swapping a single body part rarely achieves the look you want because adjacent parts create visual continuity. A muscular torso paired with thin arms looks disconnected unless you adjust both together. Community reports suggest that coordinated part swaps produce the most natural results, especially when you preview the full avatar before confirming changes.
The body customization workflow rewards experimentation. You can adjust proportions, try on clothing, and reset without penalty, which means there is no cost to testing multiple frames. Players who rush into a single configuration often discover clipping issues later, particularly with layered accessories.
R15 vs R6 Body Types Compared
Catalog Avatar Creator supports both R15 and R6 body types via the PlayerChoice avatar setting. R15 avatars animate with 15 joints and fit modern animation packs, while R6 uses the classic blocky 6-part body and pairs best with classic clothing and animations. You can switch body type in the avatar editor at any time.
Joint Structure and Animation Compatibility
The fundamental difference between these body types is joint count. R15 introduces elbow and knee joints, which allow for more natural bending during emotes and movement. R6 keeps the rigid blocky structure that defined early Roblox avatars, which is why older animation packs look correct on R6 but stiff on R15.
| Feature | R15 | R6 |
|---|---|---|
| Joint Count | 15 joints | 6 joints |
| Elbow/Knee Bending | Yes | No |
| Modern Animation Packs | Full support | Limited support |
| Classic Clothing Fit | May stretch | Perfect fit |
| Blocky Aesthetic | Reduced | Preserved |
The Catalog Avatar Creator body types guide distinction matters most when you plan to use animation-heavy emotes. R15 avatars bend naturally during dances and action poses, while R6 avatars maintain their blocky silhouette throughout. Players who prioritize nostalgic aesthetics often stick with R6 despite the animation limitations.
Scaling Behavior Differences
Scaling behaves differently between the two body types. R15 scaling distributes changes across more joints, which creates smoother transitions between body segments. R6 scaling affects entire limb blocks at once, so a height increase makes the legs longer as a single unit rather than proportionally adjusting thigh and calf separately.
The classic body R6 frame holds its shape better under extreme scaling because there are fewer joints to distort. R15 avatars can develop visible joint gaps when pushed to maximum height or width, especially around the elbows and knees. Community testing indicates that moderate scaling values produce the best results on R15.
Body Parts Value and Combos
Not all body parts carry equal visual weight. The torso and legs dominate the silhouette, while arms and head contribute secondary detail. Understanding Catalog Avatar Creator body parts value helps you prioritize which parts to upgrade or swap first when working with limited Robux.
Part-by-Part Value Ranking
The torso is the highest-value body part because it anchors the entire outfit. A well-chosen torso makes even basic clothing look intentional, while a mismatched torso undermines expensive accessories. Legs rank second because they determine height and stance, which affects how the avatar moves through the world.
| Body Part | Visual Impact | Swap Priority | Best Use Case |
|---|---|---|---|
| Torso | Highest | First | Anchors outfit silhouette |
| Legs | High | Second | Controls height and stance |
| Arms | Medium | Third | Balances torso width |
| Head | Medium | Fourth | Frames face and hats |
The Catalog Avatar Creator body parts list includes heads, torsos, arms, and legs as the four swappable components. Body bundles swap every body part at once for a complete new frame, while head bundles replace the head alone. These bundles offer the quickest way to drastically change an avatar.
Effective Body Parts Combos
Successful Catalog Avatar Creator body parts combos follow a simple rule: match width across adjacent parts. A broad torso pairs well with thicker arms, while a slim torso looks natural with thinner limbs. Mismatched widths create visual breaks that draw attention to the seams between parts.
-
Athletic combo: Muscular torso + standard legs + medium arms for a balanced action-ready look
-
Slim combo: Thin torso + long legs + thin arms for a sleek, fashion-forward silhouette
-
Classic combo: Classic torso + classic legs + classic arms for maximum clothing compatibility
-
Bulk combo: Wide torso + thick legs + thick arms for an imposing tank-style frame
The best body parts for any given avatar depend on your intended aesthetic. Players building cute or stylish avatars typically favor slim proportions, while those creating intimidating characters lean toward bulkier frames. Testing each combo with your favorite clothing items reveals which configuration works best.
Practical Customization Workflow
A structured approach to body customization saves time and prevents costly mistakes, especially when you are mixing classic body parts with newer scaling values that do not always preview correctly in the editor. The following workflow has been refined from community feedback and works for both R15 and R6 avatars, though the specific scaling values differ between body types. For example, an R6 torso set to 95% width may look proportionate on a blocky classic body, but the same value on an R15 rig can create visible shoulder clipping with layered clothing, forcing you to re-test each body parts combo before publishing.
Step-by-Step Customization Process
Start with the body type selection, then move to overall proportions, and finish with individual part swaps. This order ensures that each decision builds on the previous one without requiring constant rework. For example, if you pick the Catalog Avatar Creator classic body as your base, its fixed shoulder width and torso length determine which arm and leg scaling ranges will look natural — so locking proportions before swapping individual parts prevents mismatched limb ratios. Since the Catalog Avatar Creator body parts value system prices rarer combos higher, finalizing the structural silhouette first also lets you allocate your remaining budget toward high-impact swaps like heads or accessories rather than re-buying base geometry later.
-
Select R15 or R6 based on your animation and aesthetic preferences
-
Adjust height and width to establish the overall frame
-
Swap the torso to match your desired build
-
Adjust legs for stance and height refinement
-
Fine-tune arms and head for balance
-
Preview with clothing items to check fit
-
Test animations to verify joint behavior
The body slider controls in the editor provide real-time feedback, so you can see changes immediately without committing. This instant preview capability is essential for fine-tuning proportions because small adjustments often have outsized visual effects — for example, shifting the classic body torso slider by just one or two increments can visibly alter how body parts combos like the blocky arms and default legs read together on the avatar silhouette. Since Catalog Avatar Creator body customization values each body part independently, previewing slider changes before confirming helps you avoid wasting body parts value on proportions that only look right in isolation but clash once the full body types guide loadout is assembled.
Common Scaling Mistakes
Over-scaling is the most frequent error players make. Maximum height or width values create distorted proportions that look unnatural in-game, especially when combined with certain clothing items. Moderate values between 30% and 70% of the slider range typically produce the most balanced results.
Another common mistake is ignoring clothing compatibility. Some shirts and pants are designed for specific body proportions, and extreme scaling causes texture stretching or clipping. The head shapes and body slider guide covers proportion adjustments in more detail, including how height changes interact with head size.
Advanced Body Customization Strategies
Once you master basic scaling, advanced techniques unlock more distinctive avatar designs by exploiting how Catalog Avatar Creator body parts values interact across the classic body and layered clothing. For example, pairing a high-torso-value classic body with slim arm and leg combos creates a top-heavy silhouette that reads clearly even in crowded servers, while oversized head-to-body ratios—achieved by maxing the head slider and minimizing torso and leg values—produce chibi-style avatars that stand out immediately. These strategies work because the creator recalculates joint positions and cloth deformation from your body parts list, so deliberate mismatches between body types and outfit rigs yield silhouettes that animations exaggerate rather than normalize.
Leveraging Bundles for Quick Transformations
Body bundles replace every body part simultaneously, which is ideal when you want a complete new frame without individual swaps. Head bundles work similarly for the head alone. The Try On feature lets you preview a bundle before buying, so you can verify the full new body matches your vision.
Bundle value depends on how many individual parts you would otherwise purchase separately. A bundle that includes a torso, legs, and arms you would buy anyway offers better value than one where you only want a single component. The body parts overview breaks down individual part options if you prefer piecemeal customization.
Animation and Body Type Synergy
Animation packs interact differently with R15 and R6 bodies. R15 avatars benefit from modern animation packs that use elbow and knee joints for fluid motion, while R6 avatars work best with classic animations that preserve the blocky aesthetic. Choosing animations that match your body type prevents awkward visual glitches.
The tutorial video from watermelony demonstrates how body customization and proportions work together in the editor, with timestamps for each major feature. Watching how scaling affects clothing fit in real-time helps internalize the relationship between body parts and outfit presentation.
Frequently Asked Questions
What is the difference between R15 and R6 body types?
R15 avatars have 15 joints including elbows and knees, which enables natural bending during animations. R6 avatars use the classic 6-part blocky structure without joint bending. R15 fits modern animation packs better, while R6 pairs best with classic clothing and animations.
How do I change my body type in Catalog Avatar Creator?
Open the avatar editor and locate the PlayerChoice avatar setting. Switch between R15 and R6 from there. The change applies immediately, but you may need to re-adjust scaling values because the two body types distribute proportions differently across their joint structures.
Which body parts should I prioritize when customizing?
The torso carries the highest visual impact because it anchors the entire outfit silhouette. Legs rank second for height and stance control. Arms and head contribute secondary detail. Prioritize torso and legs first when working with limited resources or Robux.
Can I preview body customization before buying parts?
Yes, the Try On feature lets you preview body bundles and individual parts before purchasing. This applies to both body bundles that swap every part at once and head bundles that replace only the head. Previewing prevents buying parts that do not match your intended look.
Does body customization affect clothing fit?
Body scaling directly affects how clothing fits. Extreme height or width values cause texture stretching and clipping on items designed for standard proportions. Moderate scaling values between 30% and 70% of the slider range typically maintain proper clothing fit across most items.